Classification of Computers by Generation


Warning: Undefined array key "titleWrapper" in /home/kitlosco/kmacims.com.ng/wp-content/plugins/seo-by-rank-math/includes/modules/schema/blocks/toc/class-block-toc.php on line 103
Classification of Computers by Generation

Just as it took years to transit from our old black and white television to the modern smart television today, computers experienced the same transition. Classification of computers by generation is a process of arranging computers based on the period of invention.

After phasing out the Celeron, Pentium, and Cores nomenclature, Intels decided to invent the generations naming scheme in 2008. This led to classifying Intels processors as gens which come in 3 variants: Core i3, i5, and i7 beginning with its first core i3 launched in January 2010.

This repositioning brought yearly advancement and improvements in Intels processors and positioned the 5th-generation computers rightly to perform their intended tasks.

For you not to get confused, we created posts to distinguish these modern machines from the original classification of computers. You can thus learn more about the:

  1. 6th and 7th generation computers
  2. 8th and 9th generation computers
  3. 10th and 11th generation computers
    using each of the above links.

When classifying a computer system, certain characteristics are considered. These characteristics are listed in this article, while the modern classifications center on Intel’s microprocessors only.

Therefore, in this tutorial, we shall discuss the 5 primary classifications of computers by generation.

Classification of computer definition

Classification of computers is a process of organizing or arranging the computer system based on vital features.

These features can be physical size, processing ability, or mode of operation.

What is the classification of computers?

A typical computer system can be classified into four (4) different categories, namely;

Classification of Computers by Generation

After the invention of the first computer in 1945 which filled the entire room, subsequent computers showed improved capabilities. These improved capabilities are captured in the following features:

classification of computers by generation - summary
  • Higher processing power and computation strength
  • Reduced size and power consumption
  • Lower cost of production, acquisition, and maintenance
  • Better and improved programming languages

The classification of computers by generation captured the above features per generation. This shows the chronological improvement of the computer system as technology advanced. For a comprehensive article visit the post: different generations of computers.

First-generation computers –

These computers were developed between 1945 and 1956. They are based on vacuum tubes and have the following characteristics.

FeatureDescription
Vacuum tubesUsed for circuitry
Magnetic drumsUsed for memory and storage
SizeVery large
Power consumptionConsume a lot of power and generates a lot of heat
CostVery expensive to buy and maintain
SpeedVery slow (computation time in milliseconds)
Programming languageMachine language
Input/outputPunched cards/ printouts
ExamplesENIAC, EDVAC, UNIVAC

Second-generation computers –

The second-generation computers were developed between 1956 and 1963 with transistors replacing vacuum tubes. Some of the characteristics include:

FeatureDescription
TransistorsUsed for circuitry
Magnetic core technologyUsed stored program concept (instructions stored in memory), magnetic tape for mass storage
SizeLarge
Power consumptionConsume less power and generates less heat than 1st generation
CostLess expensive than first-generation
SpeedSlow (computation time in microseconds)
Programming languageAssembly language
Input/outputPunched cards/ printouts
ExamplesIBM 1401, PDP-1, UNIVAC 1107

Third-generation computers –

Third-generation computers were developed between 1964 and 1971 with integrated circuits. Other notable characteristics are.

FeatureDescription
Integrated circuitsUsed for circuitry
Hardware/ softwareThe advent of operating systems to interface between hardware/ software
SizeSmall (magnetic tape for storage)
Power consumptionLess power and less heat
CostCheaper and available to the public
Speedhigh (computation time in nanoseconds)
Programming languageHigh-level language
Input/outputkeyboards/ monitors
ExamplesIBM 360s, PDP-11, Honeywell 6000s

Fourth-generation computers –

This generation took place around 1971. It marked the advent of microprocessors in place of integrated circuits, and it is still in use today. Other major characteristics include.

FeatureDescription
MicroprocessorUsed as single processing power
RAM and cache technologyStores computation instructions for the CPU
SizeSmall and portable
Power consumptionLess power and heat
CostLess expensive
SpeedFast (computation time in picoseconds)
Programming languageHigh-level language
Input/outputKeyboard, mouse,…/monitor, printer,…
ExamplesAltair 8800, STAR 1000, CRAY-1

Fifth-generation computers –

The movement for fifth-generation computers began in Japan in 1982 through the Ministry of International Trade and Industry. The project was initiated to create computers with parallel computing technology, pattern processing, and logic programming language.

FeatureDescription
ProcessingParallel processing & computing technology
PurposeCapable of learning and organizing
CostExpensive
SpeedVery fast
Programming languageLogic programming & algorithms
ExampleApple Siri

Fifth-generation is used to refer to computers that are capable of learning and organizing based on human behavioral algorithms. They are in continuous development and are based on Artificial Intelligence and Machine Learning.

These computers and machines are developed to perform some of the basic tasks of man. They use parallel processing to enhance speed and achieve real-time results. An example of natural language processing technology is Apple’s Siri, Google Assistance, and Microsoft Cortana.

Conclusion

There are five main classes of computers by generation:

  • First-generation computers used vacuum tubes and were developed between 1945 – 1956.
  • Second-generation computers used transistors and were developed between 1956 – 1963.
  • Third-generation computers used integrated circuits and were developed between 1963 – 1971.
  • Fourth-generation computers used microprocessors and were developed between 1971 – date.
  • Fifth-generation computers used parallel processing and were developed between 1985 – date.

Each of these generations of computers has its distinguishing features which were explained in this tutorial. Check out the classification of computers by type.

The Features of Graphic Packages for JSS

Features of Graphic Packages

The features of graphic packages are tools within the software environment that make creating and editing graphics possible. Most of the graphic packages discussed under examples of graphic packages have brushes, pens, etc to create and edit objects.

In this tutorial, we shall discuss the features of two popularly used computer graphic packages.

  • Microsoft Paint which represents a painting application
  • CorelDraw, representing a vector package.

Microsoft Paint

Microsoft Paint is a simple painting graphics application that comes with all versions of the Windows operating system. It can be used to scan images and create and modify objects.

It can open and save files in the following formats: Jpeg, Gif, PNG, TIFF, and bitmap (.bmp). The bitmap file extension can be monochrome, 16 color, 256 color, and 24-Bit bitmap.

The diagram below displays the Windows 11 Paint environment.

features of graphic packages - MS Paint window

Features of MS Paint and their uses

ToolsUses
Tool widthUsed to set the width of a selected tool. E.g. eraser size or the width of a line or curve made with a pencil or shapes.
Color 1 Used for the foreground color of objects. Click this tool and select a color palette before drawing an object. It is usually used by the pencil tool, brushes, and the outline of a shape.
Color 2Used for the background color of shapes. Click this tool and select a color palette to set the background of an object. It is usually used by the eraser tool, and shapes fill.
Color paletteUsed to set the outline or fill color of an object. Choose the color of your choice from the color palette to set the foreground or background color of an object.
ShapesUsed to create an object. Choose your desired shape to draw an object such as a line, ellipse, rectangle, triangle, etc
PaintbrushesUsed to draw and apply color to an object. Choose a brush to make paintings of different thicknesses and forms. Click brushes and select a brush of your choice and start painting.
PencilUse the Pencil tool to draw freeform lines or curves.
Color fillUsed to fill an object or an enclosed shape with color. Select it, then click an area on the canvas to apply foreground color or right-click to apply a background color.
Add textUsed to add text to an object or in the workspace. Select and position appropriately to add a text.
EraserUsed to clean areas of your drawings or pictures. Select the eraser tool and choose the eraser width by selecting a size, then, clean the desired area.
Color pickerUsed to copy a color from an existing image. The color picked can be set as a current foreground or background color. To set the current foreground color, select the pick tool and click on the image color. To set the current background color, select the pick tool, and right-click on the image color.
MagnifierUsed to enlarge part of an object on the workspace. Select the magnifier and click on the object to zoom in, or right-click to zoom out.

How to create objects in MS Paint

Drawing a line: 

To draw a line in MS Paint, do the following:

  1. Select the pencil tool,
    1. Click the Size tool, from the dropdown list, select a line width of your choice
    2. Select the Color 1 tool
    3. On the color palette, select a color of your choice
    4. Use your free hand to click and drag on the workspace to draw a freeform line.
  2. Select a line from the Shapes tool,
    1. Follow steps a-c above.
    2. Click and drag on the workspace to draw a straight line.

Drawing a curve: 

To draw a curve in MS Paint, follow these steps:

  1. Select the pencil tool,
    1. Click the Size tool, from the dropdown list, select a line width of your choice
    2. Select the Color 1 tool
    3. On the color palette, select a color of your choice
    4. Using the pencil, draw a curve of your choice on the workspace
  2. Select a curve on the Shapes tool,
    1. Follow steps a-c above.
    2. Click and drag on the workspace to draw a straight line
    3. Move a distance away from the line and click twice to create a curve. Note: The length of the line and the distance from the line depends on the depth of the curve.

Draw a rectangle:

You can use the pencil tool to draw a freeform rectangle. But to draw a smooth rectangle, do the following:

  1. Select a rectangle from the Shapes tool,
  2. Choose the size, foreground, and background colors of your choice
  3. Click and drag on the workspace to draw a rectangle

Draw a square: 

You can use the pencil tool to draw a freeform square. However, do the following:

  1. Select a rectangle from the Shapes tool,
  2. Choose the size, foreground, and background colors of your choice
  3. Hold down the Shift key on the keyboard, then click and drag on the workspace to draw a square

Draw an ellipse:

Use the pencil tool to draw a freeform ellipse if you wish. However, do the following:

  1. Select ellipse from the Shapes tool,
  2. Choose the size, foreground, and background colors of your choice
  3. Click and drag on the workspace to draw an ellipse

Draw a circle: 

You can use the pencil tool to draw a roughened circle or do the following:

  1. Select ellipse from the Shapes tool,
  2. Choose the size, foreground, and background colors of your choice
  3. Hold down the Shift key on the keyboard, then click and drag on the workspace to draw a circle

Following the above steps, you can draw other shapes using the Shapes or Pencil tools.

Add a text: 

To add a text to your drawing or picture or create a text image, do the following:

  1. Select the Text tool on the toolbox
  2. Choose a foreground color of your choice. This will represent the text color.
  3. Click on the appropriate location on the workspace or object to insert the textbox.
  4. Type the text you want in the text box.
  5. Note: You can highlight, color, and change the font or size of the text; resize and move to reposition the textbox. But the textbox must be active to do these.
  6. When you are done, click outside the textbox to deactivate it.

Draw a painting:

You can use the paintbrushes to create a painting of your choice. Do the following:

  1. Click the Brushes tool, from the dropdown list select a paintbrush of your choice.
  2. Select the size and foreground color of choice
  3. Click and drag on the workspace to paint your imaginative idea.

CorelDraw Graphics

CorelDRAW is a professional vector graphic design application developed for professionals and used by expert graphic designers. It is used to create different kinds of design including illustrations, adverts, logos, engraving, printing, and publishing.

In the highly competitive market for graphic design packages, CorelDraw has a considerable market share. This is because of its rich features and acceptability among professionals.

Features of graphic packages: CorelDraw graphics

Unlike MS Paint, the features of the CorelDraw graphic package are overwhelming, especially for beginners. You may be lost the first time you open the CorelDraw window. To assist beginners, we listed the basic features of a CorelDraw window, no matter the version.

Because most graphic applications share the same features, it will help you if you choose other vector apps.

features of graphic packages - coreldraw window

Title bar:

This bar displays the title of the current open graphic window, usually, the name used to save the graphic file. If the currently opened graphic is not saved, it will display Untitled-1.

Ruler:

A ruler is used to determine the size and position of objects in the drawing window. If the ruler is not showing, go to the View menu and select Rulers.

Menu bar:

The menu bar is an area that contains the list of menus with pulled-down contents. These pulled-down contents are commands used to accomplish tasks while creating drawings. Apps without menu bars have ribbons.

Standard toolbar:

In CorelDraw, the standard toolbar is detachable. You can detach it and place it in any location of your choice. It contains popularly used commands for easy access.

Property bar:

This is a detachable bar that contains commands that is related to the selected object or tool.

Object Properties:

This property is used to apply effects on the selected object.

Color palette:

This is a moveable bar that contains color swatches.

Toolbox:

This is also a detachable bar containing tools for selecting, modifying, and filling objects in the drawing window. Learn more about the toolbox in CorelDraw.

Workspace:

All areas where drawings can be created within the window. It is bordered by the printable page.

Printable page:

This is a rectangular area within the drawing window that contains objects for printing. You can set up the page based on what you want to print.

Conclusion

We discussed the features of graphic packages using Microsoft Paint and CorelDraw. The features of CorelDraw are observed to be more complex than that of Paint. In both graphic packages, there are pencil and drawing tools to create different kinds of objects.

35 Examples of Graphic Packages

Examples of Graphic Packages

Examples of graphic packages used by graphic designers abound. There are different categories ranging from raster to vector application software.

In graphics designing, we use application packages such as Adobe Photoshop, GIMP GNU, Paint 3D, etc to manipulate raster images. And use packages such as Adobe Illustrator, CorelDraw, Inkscape, AutoCAD, etc to create vector images.

For students in junior secondary/high schools, we shall list 20 examples of graphic packages in this tutorial. The list shall be divided into painting packages and drawing packages.

Classes of Graphic Design Packages

When sourcing a computer graphics package to use, you should consider choosing from the following list.

  1. Open source graphic apps: These are software that receives a vast community of contributors. Anyone with good coding knowledge can modify such software to suit his/her needs. They are essentially free to use. So, you can download any of them and use them to practice graphic designing. Examples include Inkscape, GIMP, Gravit Designer, SVG-Edit, Pinta, etc. You can also use the free PNG to SVG converter to save your PNG file as an SVG image.
  2. Cloud-based platforms: These are platforms that provide tools that allow anyone to create and manage graphics online. Some of the platforms provide free services, with limited capability. To have full access to the features of the platform, you may need to pay. Also, such platforms can be used both on desktop and mobile devices, but they require access to the internet. Examples of cloud graphic services are Canva, Stencil, Pixlr, Fotor, AppyPie, etc.
  3. Commercial or paid software: This refers to proprietary graphic packages that one can either subscribe to or purchase. They can be desktop apps or cloud-based. They include popular brands used by professionals in graphic designing and the printing industry. Examples are Adobe Illustrator, Adobe InDesign, Sketch, Xara Designer Pro+, Genially, etc.
  4. Desktop applications: Desktop packages are applications that are installed on desktop computers for design purposes. When purchased or downloaded for free, users will not require internet access to use them efficiently. Examples are CorelDraw, Adobe Photoshop, Affinity Designer, Photoscape, Lunacy, etc.
  5. Mobile device apps: These are apps developed for mobile devices. They can be downloaded from the Apple Store or Google Play and be used on smartphones and tablets. There are apps for android and IOS devices or both. Examples are Procreate (for ios), Infinite Design (android), Ibis Paint x (android), Adobe capture (both), ArtFlow (android), etc.

Examples of Graphic Packages

We listed 20 examples of graphic packages in this section. These packages were classified as raster and vector graphic packages.

10 Examples of paint packages

These are graphic packages you can use to manipulate images and scanned documents. Remember that such images may lose their quality and clarity. 10 examples of painting graphic packages are listed below.

photo of person using laptop for graphic designs
Photo by ANTONI SHKRABA on Pexels.com
  1. Corel Painter: This is a professional digital art software for the Windows operating system (OS).
  2. Adobe Photoshop: An image editing software for windows and Mac systems. It is used to edit images, and create banners and websites.
  3. Corel Photo-Paint: An image editor that comes with the CorelDraw graphics suite. Used in photo editing and graphic designing.
  4. QFX: This is an image editing software developed by Ron Scott in 1990.
  5. Serif Photoplus: This is an image editing software for windows. It is now a legacy app with no support for updates.
  6. Picasa: This graphic package is owned by Google and it’s used to organize, edit and view digital photos. However, the service is discontinued for google photos.
  7. MS Paint: It is a graphics editor that comes with all versions of Windows OS. Higher versions of windows come with an improved version of Paint.
  8. GIMP: An open-source and cross-platform image manipulation software developed for Linux, Windows, and Mac. It can be used in place of Photoshop.
  9. Krista: A professional and open-source painting program developed by artists,
  10. Artweaver: A windows graphics editor developed by Boris Eyrich.

10 Examples of drawing graphic packages

These are application packages you can use to create, draw and modify objects. The modified objects may not lose their originality. The list of 10 examples of drawing graphic packages is given below.

  1. Xfig: An interactive drawing and open source graphic app that runs on the X Window System.
  2. CorelDRAW: A fully loaded professional graphic design software developed for professionals.
  3. Adobe Illustrator: A vector graphic editor and design application software for creating gorgeous graphics everywhere.
  4. Harvard graphics: A graphics and presentations software developed for IBM systems and released in 1986. It eventually went off the market in 2017.
  5. Affinity Designer: A professional creative software for vector graphics. It was developed by Serif and is used for illustrations, photo editing, etc. versions are available for windows and mac.
  6. Inkscape: An open-source scalable vector graphic editing software with powerful drawing tools.
  7. MS Expression Design: A professional vector graphic design and illustration tool for creating web and desktop application elements.
  8. Adobe Fireworks: A graphic editor made for web designers. It was used to create website application interfaces but has been discontinued since 2012.
  9. Adobe Freehand: Used to create illustrations, print, and website layouts. Adobe support for the application has been discontinued since 2011.
  10. MS Visio: This is a vector graphics application included with the Microsoft Office suite. It is used to draw diagrams, flowcharts, and charts.

Conclusion

In this tutorial, we enlisted 35 examples of graphic packages that can be used to create and edit objects. These examples were divided into seven categories as follows:

  • Open-source software
  • Cloud design services
  • Commercial applications
  • Desktop and downloadable software
  • Mobile apps for android and ios devices.
  • Painting graphic packages
  • Drawing app packages

For a beginner who wants to learn and create designs, you can choose from any of the first five categories. For students who are studying for exams, you can learn and identify the list of raster and vector graphics.

Types of Graphic Packages

Types of Graphic Packages

The types of graphic packages discussed in this tutorial are those approved for junior secondary/high schools. A computer graphic application package is software used to create and edit shapes and images.

There are different classes of such packages based on what they can do, and how to access them. Also, graphic apps are available for desktop and mobile users. Among them include CorelDraw, Paint, Illustrator, InDesign, Photoshop, Inkscape, etc.

In this tutorial, we shall discuss the types of graphic packages as specified in the computer science curriculum for JSS2.

The 2 Types of Graphic Packages

Computer graphic packages can be classified into two main groups:

  1. Raster graphic software
  2. Vector graphic software

Let us look at each of the two types with examples.

Raster or painting graphic packages

Raster graphic packages are also called painting applications. They are so-called because when used on an image, such image may lose its original quality.

Painting applications are used to create and edit shapes and images as an array of pixels. These computer programs will allow you to manipulate and save images in a raw file format called a bitmap.

However, traditional bitmap images are extremely large. In today’s computer operations, such sizes are not recommended, and they are not used for web services. As a result, it permits a user to save images in other acceptable formats. Such formats include JPEG/ JPG, PNG, TIFF, HEIC, and GIF. These file formats help to compress bitmap image files to smaller sizes that are more efficient to use.

Painting applications can be used to modify still images captured with a webcam or digital camera. It can also be used to manipulate scanned documents. For example, you can resize, erase and edit parts of the scanned documents at will.

Disadvantages of painting applications

Loss of image quality

One disadvantage of using a raster graphic package is that it leads to the loss of original image quality. So, if you are using a Painting application to manipulate an image, be prepared for a loss of quality.

Single unit image

Another disadvantage of using a painting application package is that images cannot be split into individual parts. A raster graphic image is a single image that cannot be separated into individual units. Hence, resizing an image resizes the whole. This explains the loss of image quality when images are resized.

For example, when you convert a drawing into a bitmap image in CorelDraw. To edit such an image, you will need Corel Photo-Paint because the image can no longer be separated.

Some examples of painting applications include Microsoft Paint, Corel Photo-Paint, Corel Painter, Photoshop, etc.

Vector or drawing graphic packages

A Vector application software is also called a drawing computer graphic package. They are so-called because they can be used to create 2d and 3d objects with utmost clarity.

Vector graphic packages are used to make paths, points, lines, curves, and shapes to create images. Such graphic packages are usually based on mathematical equations.

Drawing applications allow users to develop creative drawings from different tools such as shapes, SmartArt, freehand drawings, and color additives. When each of the individual created parts is brought together at will the developer can produce an imaginative image.

Graphic & Animation Exploration · 1
Graphic & Animation Exploration · 1 by Manuel Creignou is licensed under CC-BY-NC 4.0

Most of the images made with vector graphic packages are expressions of one’s imagination. They represent one’s creativity and mindset. Objects and images made may not look real, but they represent one’s idea, philosophy, or brand.

Advantages or Benefits of drawing applications

One major advantage of vector graphic packages is that they retain their image quality when images are altered. Hence, vector-based images can be scaled indefinitely without degrading the image quality.

In drawing packages, objects are treated as individual units. A whole object can be disintegrated and each unit altered, and be brought together again. By so doing, there is no loss in quality.

Examples of vector graphic packages include CorelDraw, Inkscape, Illustrator, etc.

Conclusion

There are two major types of graphic packages, raster or painting, and vector or drawing applications.

Raster graphic applications are resolution-based. Images are based on pixels; when scaled they lose quality and clarity. Vector graphics are resolution-independent. They can retain the highest quality at any scale.

One disadvantage of a raster application is that images are seen as a single unit that cannot be disintegrated. However, vector applications allow individual parts of an object to be modified and brought together again. A common example of a raster graphic package is Microsoft Paint, and a vector application is CorelDraw.

What is Graphic Packages?

What is Graphic Packages

What is graphic packages? Graphic packages are mobile and desktop apps used to create and modify images. Different mobile, desktop, and cloud-based graphic packages are in use by millions of users today. Some of these graphic packages are classified as raster or vector graphics.

If you are new to basic computer operations, you will learn about word processing, spreadsheets, presentations, and probably graphic apps. Graphic designing is a major skill used by businesses and organizations to communicate visual messages to their audience.

Computer graphic packages are one of the applications required in basic computer studies for Junior Secondary/high school students. It is used to teach students how to paint and create basic designs.

FRIDA'S Resto-Boutique
FRIDA’S Resto-Boutique by Jean-baptiste beaudelle is licensed under CC-BY-NC-ND 4.0

In nursery and elementary schools, children start early to learn creativity using drawing books. They learn how to color and draw basic shapes. In junior secondary school, they are introduced to computer graphics to learn how to paint and create designs.

This tutorial is created for junior secondary/high school students. At the end of this tutorial, you will know what is a graphic package and list 10 uses of graphic packages.

What is Graphic Packages?

A graphic package is application software used to create and modify shapes and images. It is a computer program or a mobile app that can be used to perform basic graphic operations.

Some of the basic operations you can perform with graphic packages include:

  • Creating basic drawings using preset shapes or free drawing tools
  • Applying and filling shapes with colors
  • modifying images of different degrees.
  • Importing images and shapes
  • Converting shapes to bitmap images
  • Scanning documents and images

However, the quality and kind of image or shape to be created depends on the type of graphic package.

Computer graphic packages have basic features that allow users to create and manipulate shapes and images. Some of these features are present in all the graphic package software. They include but are not limited to pencil, eraser, paintbrush, basic shapes, and editing tools.

List of 10 Uses of Graphic Packages

There are different uses of graphic packages. Each usage depends on the type of design you are creating. As a beginner, let’s list 10 uses of graphic packages.

  1. Scanning of documents and pictures: Graphic packages provide a tool that helps in converting hardcopy documents into softcopy in varying degrees of resolution. You can also scan pictures into the computer system using such apps.
  2. Editing shapes and images: Graphics packages can be used to modify shapes and images. Tools such as pencil, eraser, paintbrush, etc can be used to modify existing images.
  3. Create brand identity: With graphic packages like CorelDraw, you can create brand identity such as logo, business card, company letterhead, etc. Your choice of an app depends on the nature of the design. CorelDraw can be used to create simple and sophisticated designs.
  4. Digital printing and the printing press: Graphic packages are mostly used by print media to develop digital materials such as kindle and ebooks. They also have features that allow them to create and produce volume printing such as newsletters, books, magazines, etc.
  5. Develop and publish marketing materials: They can be used to create online and offline marketing materials such as flyers, banners, etc.
  6. Create and print brand-differentiating materials: Some graphic packages can be used to create visual materials for product differentiation. Product labels, packaging designs, t-shirts, cover designs, etc can be created using some graphic packages.
  7. Creation of communication patterns: You can create different communication patterns using graphic packages. For example, you can create concept arts, t-shirt designs, etc.
  8. Create visual patterns: You can also use graphic apps to create environmental design and visual patterns. Examples include creating signage, street signs, traffic signs, etc.
  9. Teaching and learning: Computer graphic software can be used to teach elementary graphics to students. Also, students use them to learn the basics of drawing and painting in school.
  10. View images: one of the most used graphic packages is to view images and pictures. Depending on the type, you can view images with different file extensions such as jpg, png, tiff, gif, etc.

Conclusion

This is a recap of what you learned so far in this tutorial.

  • Graphic packages are used to create and modify shapes and images
  • They are part of the junior secondary/high school curriculum.
  • They can be used to scan, create and edit digital and hardcopy materials.
  • Their uses include: creating brand identity, ebooks, adverts, product labels, and visual patterns.

To know how to become a graphic designer, visit the post what is graphic designing?

Electronic Counting Devices and Modern Computer

Electronic Counting Devices and Modern Computer

Electronic counting devices are improved mechanical devices that use electricity circuitry to function effectively. These devices finally paved the way for modern computing technology.

The modern computer was built through the inspired works gathered from the electromechanical counting devices. Notable among them is the Jacquard’s loom and Babbage’s analytical engine. They are called stored-program computers, following the Neumann architecture.

electronic counting devices infograph

In this tutorial, we shall discuss the following:

  • Herman Hollerith punch cards
  • Neumann machine
  • Modern computers
  • Philip Emeagwali

Herman Hollerith Punch Cards

Herman Hollerith punch cards device is an electronic tabulation machine used in statistical calculation and analysis. The device was born out of a government contest to devise a solution to end the 1890 census earlier than the 10-years proposed.

Herman Hollerith was a German-American statistician, inventor, and businessman. He invented the punched card tabulating machine which were used in summarizing statistical and accounting information. His invention took place in 1882 – 1884 when he filed for his first patent.

The machine was used to process information obtained in the 1890 United States population census. With this machine, he was able to achieve in three years would have taken ten years to accomplish manually.

Hollerith 45 column horizontal electrical sorting machine, 1920-1930 (data processing equipment)
Hollerith 45 column horizontal electrical sorting machine, 1920-1930 (data processing equipment) by British Tabulating Machine Company Limited is licensed under CC-BY-NC-SA 4.0

Hollerith used Jacquard’s punched-card idea to feed personal statistics into his machine.  Holes in the punched cards stood for a person’s age, sex, state, and other similar information.  There was one card for each person.

As each card was fed into the machine, a set of metal pins were brought down on the card. The cards are then processed by pushing down the pins through the holes to enter cups of mercury underneath. The electrical circuitry is then completed by reading, sorting, or counting punched cards through a dial on the tabulator.

To sell the machine, Hollerith formed the Tabulating Machine Company in 1896. The company later merged with several other companies to form the Computing Tabulating Recording Company (CTR) in 1911. CTR later became part of the International Business Machines (IBM) in 1924.

Neumann machine

John von Neumann was a Hungarian-American computer scientist, engineer, mathematician, and physicist. He developed MANIAC – Mathematical analyzer, numerical integrator, and computer when he was a director at Princeton’s Institute for Advanced Study. MANIAC was the fastest computer at that time (1945-1955).

During his study, he described a design architecture for a digital computer. According to him, a digital computer should have the following components:

  • The Input/ output components for entering data and outputting information from the computer.
  • The processing unit includes the arithmetic logic unit (ALU) and processing registers.
  • The control unit which has the program counters and instruction registers
  • The memory that stores temporary data, instructions and mass data
  • The bus that transmits data and information between the other units.
Von neumann architecture

Neumann’s idea became an important contribution to organizing and building a high-speed digital computer system. His discovery was referred to as a stored-program technique, in which programs and data are stored differently. This architecture became the standard for future generations of high-speed digital computers and was universally adopted.

The principal feature of a von Neumann machine is that the program and data are both stored together. Storage usually takes place in the hard disk and is transferred as required to the memory (RAM). Data in the memory is then fetched for execution by the central processing unit (CPU).

Since this is practically how all present-day computers work, Neumann is termed the father of the modern computer.

Before Neumann’s idea, programs were viewed as an essential part of the machine. They are usually different from the data the machine executes. A common approach was to input the program by some physical means, such as wiring a plugboard. Data are manually fed into the machine for subsequent execution.

As a result of Neumann’s discovery, computing and programming became faster, more flexible, and more efficient.

In 1945, von Neumann proposed the stored program concept in his report on the EDVAC. Together with computer pioneers, J. Presper Eckert, John Mauchly, Arthur Burks, and Hermann Goldstine.

According to the original papers of the proposal, the new architecture has five parts: ALU, CU, memory, input/output, and bus. The bus provides a data path between these parts. There are a data bus, address bus, and control bus. Such a computer operates by performing the following sequence of steps:

  1. Fetch the instruction from memory at the address in the program counter.
  2. Add the length of the instruction to the program counter.
  3. Decode the instruction using the control unit.
  4. Go back to step 1.

Von Neumann computers have some drawbacks.

Von Neumann bottlenecks

Neumann’s architecture imposes a performance problem on a computer system. This problem is referred to as the Von Neumann bottleneck. By his architecture, the program memory and data memory share the same bus. This implies that the program memory and the data memory can access the bus one at a time.

By this, instructions can be processed one at a time. In particular, they carry out instructions one after another, in a single linear sequence. Also, they spend a lot of time moving data to and from the memory. This reduces the rate at which the CPU can work and the overall processing speed of the computer.

However, various solutions have been proposed to mitigate this bottleneck. Part of the solution is to:

  • Provide a cache between the CPU and the main memory
  • Provide different caches for data and instructions
  • Use branch predictor algorithm
  • Use parallel computing technique.

Modern computers

Following Neumann’s idea of stored-program computers, different kinds of computers were designed and produced. Some of these early computers are:

ENIAC

Electronic Numerical Integrator and Computer (ENIAC) was the first general-purpose and programmable computer. It used decimal rather than binary numbers and was first operational in December 1945.

Manchester Mark 1

This machine was designed and built at Victoria University of Manchester in England. It ran its operational version in April 1949.

EDSAC

EDSAC – Electronic Delay Storage Automatic Calculator was inspired by Neumann’s report on EDVAC. It was constructed by Maurice Wilkes and his team at the University of Cambridge Mathematical Laboratory, England. It ran its first program in May 1949.

EDVAC

Electronic Discrete Variable Automatic Computer – EDVAC succeeded ENIAC at More School of Engineering, Pennsylvania. It was finally delivered to the Ballistic Research Laboratory in 1949.

UNIVAC

Universal Automatic Computer was invented by Presper Eckert and John Mauchly. The first version was delivered to the census bureau in march 1951. Before UNIVAC, Eckert-Mauchly had built BINAC (Binary Automatic Computer). BINAC was the first general-purpose computer built for commercial use, but it was unsuccessful.

Philip Emeagwali

Philip Emeagwali is a Nigerian-American computer scientist and geologist. He is popularly called the Bill Gates of Africa due to his contribution to the development of a supercomputer.

His work with simultaneous calculations on connected microprocessors earned him a Gordon Bell Prize in 1989. The award, from IEEE, is considered the Nobel Prize in computing.

He developed a system to hook up over 60000 microprocessors rather than use eight expensive supercomputers to help analyze petroleum fields. His discovery led to the invention of the world’s fastest computer.

He programmed the Connection Machine to compute a world record 3.1 billion calculations per second using 65,536 processors to simulate oil reservoirs. The connections correctly detected the amount of oil in a simulated reservoir. He has submitted over 41 inventions to the US patent and trademark office.

List of Electronic Counting Devices

Counting devices refer to equipment or kits used to perform arithmetic operations. Some can handle simple, while others can handle complex arithmetic and logical operations.

The von Neuman architecture gave rise to the development of different general-purpose computers. These computers are used for counting and computations of varying degree.

As years passby, advancement in technology led to the invention of different sizes of electronic devices. Some are used for specific purpose, while others are general-purpose like the first computers.

Some of the past and present electronic counting devices include the following:

  1. Herman Hollerith punch cards
  2. ENIAC
  3. EDSAC
  4. EDVAC
  5. UNIVAC
  6. Manchester Mark 1
  7. Laptops, desktops, tablets, smartphones, and calculator

Conclusion

In this tutorial, we discussed electronic devices and the advent of the modern computer. Hollerith tabulation device was a known mechanical device that used an electrical circuit for a complete system of operation.

The Neumann architecture later paved the way for the development of a stored-program computer. This led to the invention of modern computers like Manchester Mark 1, EDSAC, ENIAC, and EDVAC computers.

ElectroMechanical Counting Devices

ElectroMechanical Counting Devices

When a device combines manual and electrical processes, it is called an electromechanical device. This is because there is an interaction between electrical and mechanical systems for such devices to function effectively.

Therefore, electromechanical counting devices can be defined as calculating devices that combine manual and electrical processes.

However, the devices under this category are devices that use mechanical processes to perform arithmetic operations. They are so-called because their operations are mechanized, and their development inspired the modern-day computer.

The difference between mechanical and electromechanical counting devices include the following:

  1. Mechanical devices utilize complete manual operations. They are operated manually by moving some of their components. E.g. moving of beads in an abacus, and bones in Napier’s bones.
  2. Mechanical devices require manual computation of results. The movement of its components requires the operator to determine results based on positioning. E.g. the position of the center slider and the metal cursor in the slide rule.
  3. Computation error. Because results are manually determined, there is a high tendency of arriving at an error. An operator might misjudge a position, and miscalculate a result, especially when not familiar with the operation procedure.
electromechanical counting devices infograph

In electromechanical calculating devices, the operator inputs the numbers while the device outputs the results.

In this tutorial, we shall discuss the following examples of electromechanical counting devices:

  1. Pascaline
  2. Leibniz calculator
  3. Jacquard loom
  4. Analytical engine

Examples of Electromechanical Counting Devices

There are four (4) examples of electromechanical counting devices discussed in this tutorial. Let’s briefly look at each of them.

The Pascaline or Pascal’s calculator

Blaise Pascal was a French mathematician, physicist, and philosopher. He is credited with the invention of the adding machine called Pascaline or Blaise Pascal Machine.

Blaise Pascal invented his adding machine in 1642, at the age of 18 to assist his father’s auditing work. Pascal’s father was a tax collector in Rouen and the machine relieved him of the tedious accounting work involved.

The Pascaline had different versions beginning from the 5-dial version to the 10-dial version. He continued to improve the robustness and reliability of the machine on each version.

Pascal machine consists of clogged wheels, gears, and dials. Accumulator and output window. Each wheel dial has numbers 0 – 9 within its circumference. The output window displays the content of the accumulator. The machine also has a mechanism that allows it to carry from one wheel to the next.

The Pascaline is used to perform addition, subtraction, multiplication, and division. However, it is called an adding machine because it uses repeated additions and subtractions to multiply and divide respectively. To perform subtraction, the number to be subtracted is converted to its complement, which is then added to the first.

The Pascaline was designed to be used by accountants, scientists, and surveyors. Its mechanism of operation is still in use today. The machine had input, processing, and output devices.

The Leibniz Calculator

The Leibniz calculator was the first true calculator that performs the functions of addition, subtraction, multiplication, and division. The Leibniz calculating machine also called the Leibniz wheel or stepped drum was an improved version of Pascaline.

It was invented by a German Polymath, Mathematician, Scientist and Philosopher, Gottfried Wilhelm Von Leibniz in 1673. His invention came as an inspiration when he was working on adding automatic multiplication and division using the Pascaline. He thus invented the Leibniz wheel.

Numeria electrical calculating machine, sterling m (calculating machine (Leibniz type))

His calculating machine later became the first commercially produced mechanical calculator. Leibniz also refined the binary number system which is the foundation of modern computing devices. He is therefore called the founder of computer science.

The Leibniz machine used a wheel with teeth on them, termed the “steeped wheel”, which allowed long multiplication and division. The process of multiplication involved repeated addition and division involved repeated subtraction.

The calculator made it easier and faster to perform basic arithmetic operations. Therefore, it is regarded as the first true calculator.

The Jacquard Loom

The Jacquard loom is a mechanical device controlled by punch cards. It is used in the production of textiles with complex patterns. The device was developed by a Frenchman, Joseph Marie Jacquard in 1804.

With the loom, you can produce fabrics with complicated woven patterns such as tapestry, brocade, and damask. With the loom, complex patterns can be manufactured by unskilled workers within a fraction of the time it’ll take expert weavers.

The Jacquard loom was an improvement on the punch-card technology developed by Jacques de Vaucanson’s loom of 1745. Punched cards are used to control the actions of the loom by allowing the production of complex woven patterns.

Model of a Jacquard loom, with shuttle and components (model; Jacquard loom)
Model of a Jacquard loom, with shuttle and components (model; Jacquard loom) by Unknown maker is licensed under CC-BY-NC-SA 4.0

When punch cards are interchanged, it controls the weaving of any desired pattern to be made automatically. Hence, the punched cards are used to instruct the machine to perform automated tasks. With punch cards, a predefined and modifiable production pattern can be read and executed by the machine.

Jacquard loom becomes the first mechanical device that used instructions (programming) to produce an output. It also revealed that information can be extracted, stored, and inputted into a machine to produce a similar outcome. Thus, with the loom, it was discovered that the program (software) can be separate from the hardware. With this inspiration, Charles Babbage developed his analytical engine.

The Analytical Engine

The analytical engine is a general-purpose programmable mechanical device proposed and designed by Charles Babbage.

Charles Babbage was an English mathematician and a professor at Trinity College, Cambridge, England. He conceived and proposed two mechanical machines:

  1. The difference engine, and
  2. The analytical engine

The difference engine was a mechanical calculator that tabulates polynomial functions using Newton’s method of divided differences. However, in 1833, Babbage could not continue the development of the machine due to a lack of funds.

Difference Engine No.2, designed by Charles Babbage, built by Science Museum (difference engine)

The analytical engine was conceived in 1834 and was proposed to be a programmable multipurpose calculating device. With the concept of Jacquard’s loom, he designed a machine that could solve complex problems through controlled programs.

The analytical engine was designed to have four main parts which are used by the modern-day computer:

  • The punch cards or readers were used to enter data into the machine. This becomes the keyboard in a modern computer.
  • The mill which performs the computations. This essentially translates to the processor.
  • The store where numbers and computation results are kept. This translates to computer memory.
  • The output or printer which gets out the results. The output could be in hardcopy printouts, punched cards, and stereotypes.

Babbage’s designs were similar to the general design of modern-day computers. It includes a central arithmetic unit for calculating, called a mill, an area for retaining numbers, called a store, and methods for input and output.

Unfortunately, Babbage could not completely build his proposed machine until he died in 1871. However, his idea and concept gave birth to the modern computer. He is therefore regarded as the father of the computer.

While working on his analytical engine, Babbage began a correspondence with poet Lord Byron’s daughter, Ada Lovelace. She developed the program for the analytical engine to compute a sequence of Bernoulli numbers. Her ideas of programming, such as “branching” to perform decisions and repetitions earned her the first computer programmer. The programming language “Ada” is named after her.

Conclusion

Electromechanical counting devices were an improvement to mechanical counting devices.

In this tutorial, we discussed the four (4) notable devices: Pascaline, Leibniz calculator, Jacquard loom, and Analytical engine. Their development and continuous improvement in technology gave birth to modern computing devices.

Mechanical Counting Devices with Examples

Mechanical Counting Devices with Examples

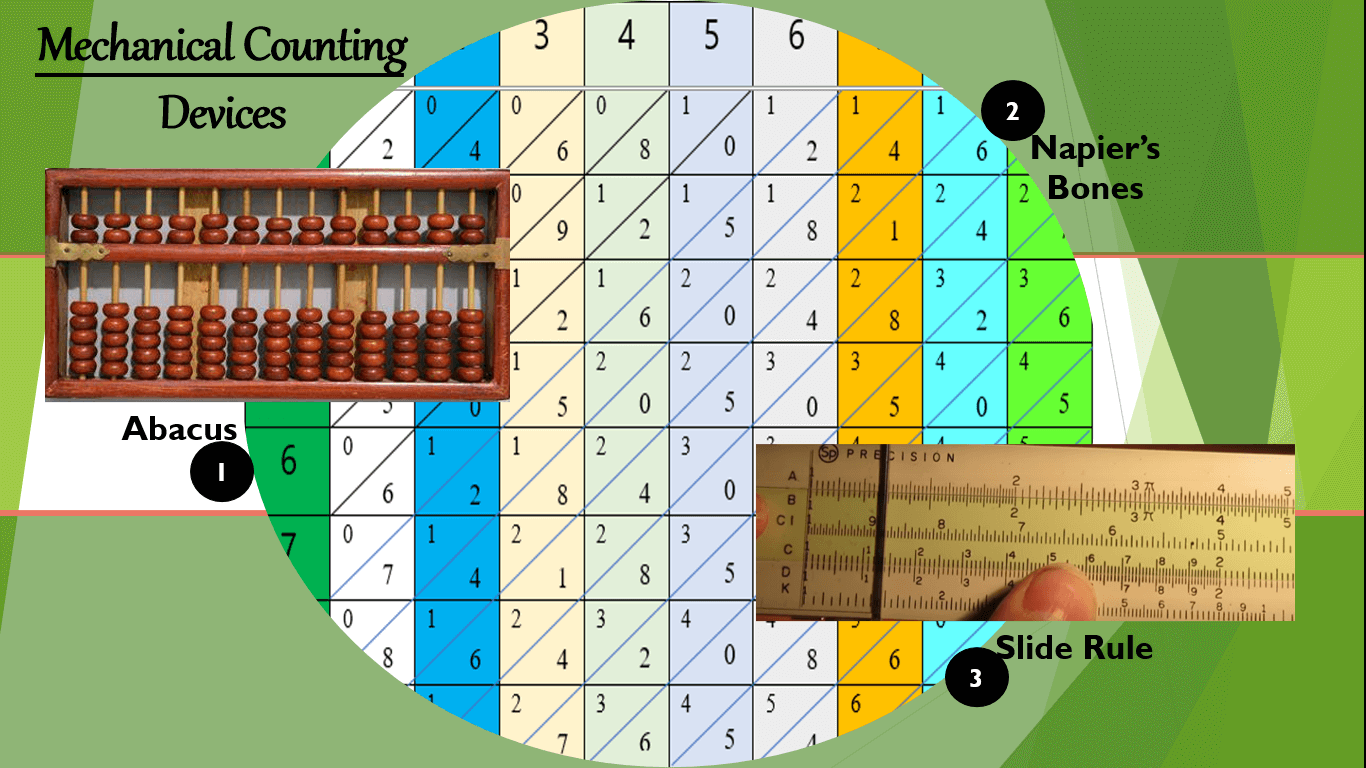
Mechanical counting devices are simple machines used to perform arithmetic operations. These machines are operated manually to perform basic calculations. Two major reasons led to the invention of these calculating devices:

  1. The disadvantages of early counting devices
  2. Increasing commercial activities

The problems associated with the early counting devices majorly led to the invention of simple tools that aid calculations. The number limitation and bulky nature of these devices made it difficult to compute complex numbers.

As cities began to develop, commercial activities and business transactions also began to grow. This growth led to complex additions, subtractions, and divisions that early counting devices cannot handle.

Also, there was growth in inter-city and inter-state business transactions making it difficult to carry bulky counting devices in transit. All these led to the invention of simple machines to replace the earlier devices. These newly found devices were later called mechanical calculating devices.

In this tutorial, you learn the following:

  • What are mechanical counting devices?
  • Examples of mechanical counting devices.

What is mechanical counting devices?

Mechanical counting devices are manually operated devices for counting and calculating numbers. They are simple equipment that can be operated manually by individuals.

Some of the equipment can be used to perform simple arithmetic operations like addition, subtraction, division, and multiplication.

Examples of Mechanical Counting Devices

There are three (3) main examples of mechanical counting devices. They include the following.

  • Abacus
  • The slide rule, and
  • Napier’s bones.

Let us discuss each of them in detail.

Abacus

Abacus was one of the first calculating devices developed to help in arithmetic operations when trading between countries became important. Its nature and usage helped to overcome some of the problems associated with the early counting devices.

The abacus is made of beads or stones and strings or wires with marked-out positions. The position of a bead is used to determine its value. Four beads are in the down columns, and one bead is in the top columns. The bead in the top column is used to represent a 5. For example, to represent a seven, you will pull a top bead down and pull two bottom beads up.

child playing with an abacus and learning to count
Photo by Yan Krukov on Pexels.com

In the beginning, the abacus was just a board with stones or sticks. On the surface of the abacus, there were parallel notches or grooves.

People made calculations by moving stones or sticks. If numbers are to be added, stones were added, if subtraction is to be made, stones were taken off. If it were multiplication, double summing was made. When dividing, double subtraction was performed.

The abacus counting device is an instrument used for counting as far back as 300 – 500 B.C. Its main objective is to make calculations easier and to suit the various number systems.

There are different types of abacus counting devices. They include the Chinese abacus called Suanpan which is still in use today. This device was invented in the 6th century.

Also is the Roman abacus, named Calculi or Abaculi, and the Japanese abacus, called Soroban. Soroban was used in the 16th and 17th centuries.

As civilization advanced, the Chinese substituted stones for pearls and bullets and these were put into wire or string. Similarly, the Roman abacus was made of bronze, stone, ebony, or colored glass.

Napier’s bones

The abacus helped so much in performing additions and subtractions, but could not be used in complex multiplications. Then comes the invention of Napier’s bones.

Napier’s bones are rods on which numbers are marked. Each bone contains the multiplication of numbers 0 to 9. The value of the product of each number is written in a diagonal form as shown in the figure below.

napier's bones

Note: I removed the zero (0) column since it is practically insignificant. Students can use a cardboard sheet, cut out 10 columns and mark them as shown in the figure above.

Multiply numbers

To perform simple multiplication, you will place the number to be multiplied along the first column. To perform complex multiplication, you place the numbers to be multiplied along the first column and then add the results.

For example, let us multiply the following numbers:

  1. 258 x 5
  2. 455 x 36

To perform the first multiplication, students should line up columns 2, 5, and 8 along the first column. Then add the values along the 5th row as shown below.

multiply in napier's bones

Do the following:

  1. The first entry in column 2 is 1, record 1.
  2. The second entry in column 2 is 0. Add the second entry to the first entry in column 5. You have [0 + 2 = 2]. Write down 2. Now you have 12.
  3. The second entry in column 5 is 5. Add 5 to the first entry in column 8. You have [5 + 4 = 9]. You now have 129.
  4. The second entry in column 8 is 0. Include 0 in your numbers to have: 1290. Therefore, 258 x 5 = 1290.

Note the following: if the added number exceeds 9, add the tenth unit value to the most left-hand value. For example, if we multiplied the 258 by 9, you will have:

multiply in napier's bones
  1. 1.
  2. [8 + 4 = 12]. Write down 2 and add 1 to the previous 1. You will have 22.
  3. [5 + 7 = 12]. Write down 2 and add 1 to the previous 2. You will have 232.
  4. Bring down 2 to finally have: 2322. Thus, 258 x 9 = 2322.

In the second example, do the following:

Lay columns 4,5, and 5 together with the first column, and extract rows 3 and 6.

  1. Using the method discussed above, add column 3 to have: [1, 3, 6, and 5 = 1365]
  2. Also, add column 6 to have: [2, 7, 3, and 0 = 2730]
  3. Add the two results together starting with the last row (i.e. row 6): 1365
  4. Move the first row one digit to the left and add 0 at the end as follow: 2730 + 13650 = 16380. Therefore, 455 x 36 = 16,380.

Divide numbers

The division is performed by repeated subtraction. For example, to divide 5768 by 25, do the following:

divide in napier's bones
  1. Lay columns 2 and 5 together with the first column, and obtain their corresponding products.
  2. Locate the highest product value that is less than the first two digits in 5768. Of the products, 50 is the highest which is less than 57.
  3. Subtract 50 from 57, and bring down the remainder. Then, write out the row that produced 50, which is row 2.
  4. Bring down the next value (6) to have 76, and find the largest product that is less than 76. The value is 75. Write out the row value, that is 3.
  5. Subtract 75 from 76 and bring down the remainder (1). Bring down the remaining value (8) to have 18.
  6. Find the largest product that is less than 18. The value is 0. Write out the row value, which is 0.
  7. The remainder of 18 is indivisible.

Therefore, 5768/25 = 230 18/25 = 230.72

Napier’s bones were invented in 1617 by a Scottish mathematician named John Napier. It is widely used to perform simple and complex multiplications and divisions. In some cases, it can be used to obtain square roots.

Napier's bones (Napier's bones)
Napier’s bones (Napier’s bones) by John Napier is licensed under CC-BY-NC-SA 4.0

Napier later invented tables of Logarithms which enabled multiplication and division to be carried out by simple addition and subtraction.

Slide rule

The slide rule is an advanced manual device used to perform complex mathematical calculations. With the slide rule, you can perform multiplication, division, power, square root, and trigonometric functions calculations.

The slide rule is made up of two fixed bars and a center sliding bar. The metal window has a hairline feature that is called the cursor which is used for an accurate reading.

Friel-Sturdy radiographic slide rule (slide rule (radiation))
Friel-Sturdy radiographic slide rule (slide rule (radiation)) by Unique Slide Rule Company; Friel, D. J.; Sturdy is licensed under CC-BY-NC-SA 4.0

On the left-hand side of the slide rule are marked scales A – D. The number of scales on a slide rule varies depending on the number of mathematical functions the slide rule can perform.

Use the scales in A and B to perform multiplication and division and scales C and D for square and square roots. These numbers are marked according to a logarithmic scale with the first number on the slide rule scale being 1. This is because the log of zero is 1.

The slide rule was invented by an English mathematician and Anglican clergy, William Oughtred in 1622. This invention was necessitated by the invention of logarithms by John Napier. And the creation of logarithmic scales by Edmund Gunter.

This device is equivalent to today’s pocket calculator. To learn how to use the slide rule, visit the following resources: 2.972 How A Slide Rule Works (mit.edu).

Conclusion

The mechanical calculating devices are still useful because they help in teaching children basic calculations. With Napier’s bones children can learn how to perform multiplications and divisions using repeated additions and subtractions. The use of the abacus, Napier’s bones, and slide rule metamorphosed into the invention of electro-mechanical counting devices.

Early Counting Devices for JSS: Examples and Limitations


Warning: Undefined array key "titleWrapper" in /home/kitlosco/kmacims.com.ng/wp-content/plugins/seo-by-rank-math/includes/modules/schema/blocks/toc/class-block-toc.php on line 103
Early Counting Devices for JSS

Early counting devices were objects used before modern civilization to perform arithmetic operations such as additions, subtractions, multiplications, and divisions.

Before modern civilization, people invented counting devices that helped them perform simple calculations. Most of these ancient counting devices are still in use today.

The old counting devices are especially used in nursery schools and kindergarten to teach children how to count numbers. Though these early counting devices are useful, they have their disadvantages.

In this brief article, we shall discuss the following:

  • What are early counting devices
  • Examples of early counting devices
  • Problems and benefits of early counting devices

This article is suitable for junior school students and novices who are studying computer studies in secondary schools.

early counting devices

What are the Early Counting Devices?

Early counting devices could be defined as devices used to perform arithmetic operations before the advent of modern civilization.

People learned how to count and perform arithmetic operations well back in the Stone Age. During this period, there were no complex commercial activities. People would add, subtract, multiply, and divide simple numbers. Hence, numerical operations were not as complex as it is today.

As a result, very simple devices were used in performing these simple arithmetic operations. Some of the devices used to perform arithmetic operations in those days coincide with what our children use today.

In our homes and schools, our children are taught basic arithmetic operations using these old counting devices. However, some of them have been modernized to suit the present-day educational system.

Examples of early counting devices

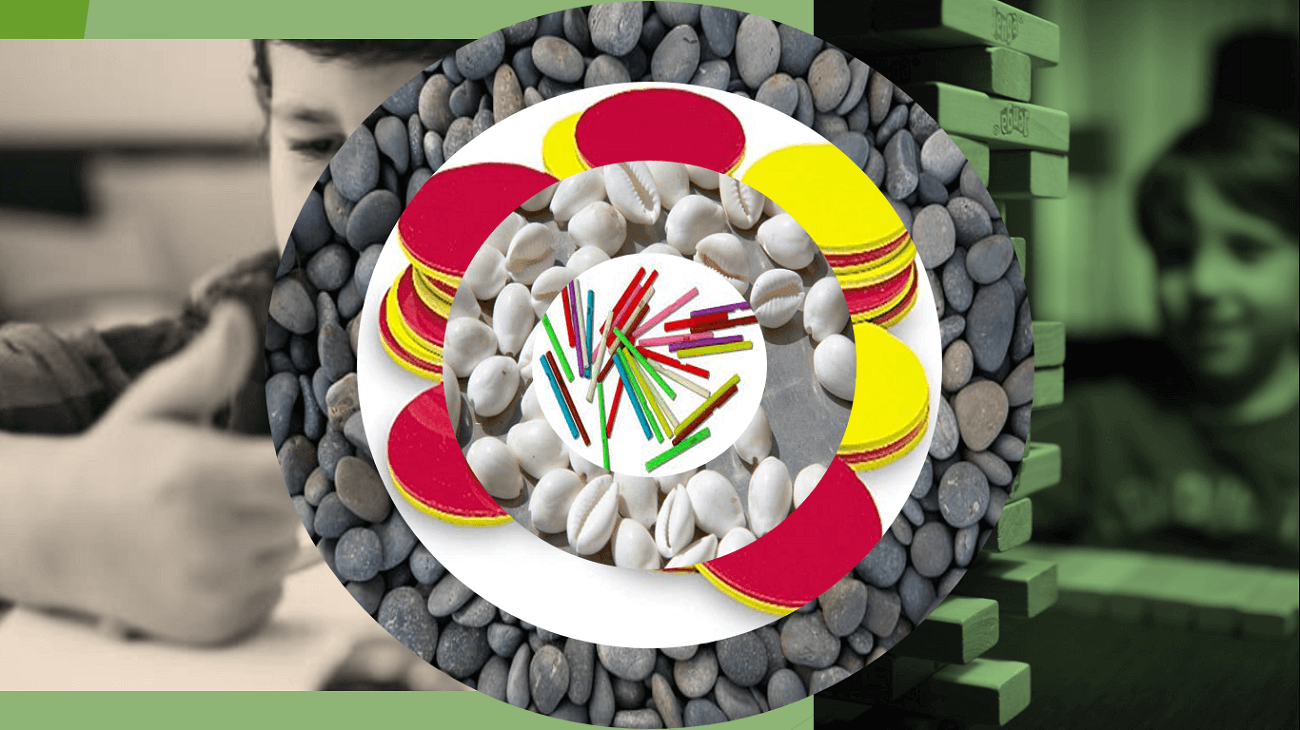
Seven (7) examples of early counting devices include:

  1. Fingers: Fingers as a counting device are as old as man. We have 5 fingers on each hand, and these fingers can be used to make quick additions. This is the earliest and easiest counting device used by man to date. Its limitation is that there is a total of 10 fingers, hence counting cannot exceed ten without causing confusion. Though adults can count up to 20 numbers.
  2. Cowries: Cowries were used as currency in the early days. It became an important tool for counting numbers and performing simple arithmetic. Though they are not easily seen today, their usefulness in the early days cannot be overemphasized.
  3. Wooden sticks: These are small local sticks that serve as counting objects. In our early years in primary school, we cut sticks that helped us perform addition and subtraction. This has been replaced with notch sticks.
  4. Pebble/ stones: Pebble or small stones served as counting devices in the early years. These are small and smooth stones that can be used to perform basic addition and subtraction. Though they are heavy to carry, children in villages still use them today.
  5. Counters: Before the invention of counters, bottled drink covers were used as counters. Counters are flat plastics of different colors that aid in addition and subtraction. They are usually of two colors so one can easily differentiate between the two numbers being added.
  6. Notch sticks: A notched stick is a replacement for wooden sticks. They are colorful and fanciful short sticks used to aid counting.
  7. Counting boxes: Counting boxes are mostly used in businesses. Each box is appropriately labeled to aid in counting and taking useful records.

As you can see, fingers, counters, notch sticks, and counting boxes are still in use.

Problems or disadvantages of early counting devices

What are the possible problems, limitations, or disadvantages of early counting devices? the following are seven (7) problems and disadvantages of early counting devices.

  1. They cannot be used to count large numbers. Think of using a pebble stone to perform the following addition: [2500 + 3765]. You may run out of stock. Modern counting sticks and boxes are limited to a certain number.
  2. They are bulky. You may not be able to carry them from one place to another. Consider a situation where you need to carry 10000 pebble stones because of a business transaction. It is awkward. Even in our modern education system where sticks and boxes are used, students do not carry them up and down. They are kept in classes or stored for the students to use when they come to school.
  3. Using them consumes a lot of time. Let us assume that you need to add up the following two numbers [379 + 578]. How long do you think it will take you to count each number before joining them together? 10mins, 15mins, or 20mins? Do the same with a calculator. Can you see how terrible these devices can be in consuming your time?
  4. As a follow-up to the above, it is prone to errors. If you can use it to count large numbers, how sure are you that what you get is what it is? Imagine when you are counting up to 200 pebble stones, it is easy for you to make mistakes when distracted. Hence, it might not give us accurate results.
  5. They are limited in scope and cannot go beyond certain numbers. As have explained above, there is a limited number of such devices you can carry at a point in time.
  6. Some of the old counting devices can turn out to be a weapon that will harm the children using them. Consider the stones and pebble sticks, children may use them to play and end up harming themselves. When such happens, what should have been useful becomes injurious to our children.
  7. Finally, they are not suitable for carrying out arithmetic operations. This is because they are very slow to use when performing operations such as additions, etc.

Advantages or Benefits of early counting devices

Despite the numerous disadvantages, early counting devices have their benefits. Some of the benefits are discussed below.

  1. They can be used to teach basic arithmetic operations such as addition and subtractions
  2. They are simple to use, hence suitable for teaching children in their early years of education
  3. They help build up children’s intelligence quotient and memory retention capacity. Unlike the modern counting devices that store everything electronically, the ability of a child to master basic additions helps him/ her throughout life. This means that he/she can comfortably work in the absence of electronic devices.
  4. They are means of introducing a practical learning system in the education system. Learning by doing helps understanding and retention.
  5. They lead to deep concentration which helps in developing a child’s mental calculation abilities.

Conclusion

It can be said that the early counting devices have not gone into complete extinction. Though there are hundreds of electronic counting devices on the market today, old counting devices are still useful.

In modern civilization, some of the devices have been transformed into counters, notch sticks, and boxes. These devices help our children to easily perform simple arithmetic operations.

For example, it is easy for children to perform additions and subtractions by moving sticks or counters. Despite their usefulness in today’s child education, early counting devices have their disadvantages.

How to Package and Share Your PowerPoint Presentations

One reason for creating a PowerPoint presentation is to share the information with others. To share your PowerPoint presentation means bringing your presentation alive before your audience to trigger their participation.

If you have successfully created professional presentations, you will need to share them with your audience. Different kinds of audiences demand different kinds of delivery.

For example, a PowerPoint file can be delivered as a slideshow, a video file, or a pdf file. While the pdf version can be printed as a handout, the other methods will be viewed by the audience.

How can you package and share your PowerPoint presentations? There are 3 ways:

  1. Share your PowerPoint presentations directly with your audience
  2. Share your presentations online in real-time
  3. Package and share your PowerPoint presentations using storage devices.

In this tutorial, we shall discuss how to package and share your PowerPoint presentations with any kind of audience.

Finalizing your Presentations

Before you share your PowerPoint presentations, you need to do the finishing touches. Prominent among them include:

  1. Ensuring that all required contents are in place and slides ordered appropriately
  2. Set up a slide show for each required audience
  3. Rehearse the timing of the presentation to ensure the time suitably aligns with the time provided for the presentation.

Fine-tune the content of your presentation

Go through your presentation over and over by previewing the slide show to ensure that suitable contents are added. At this time, remove irrelevant contents and order the slides appropriately.

If there is a need to create sections, table of contents, or custom shows, create them accordingly. Ensure that every necessary thing is in place for the presentation to go live.

Set up the slide show

To learn how to set up a slide show, visit our previous tutorial on Create a Custom slideshow. However, you will add the following steps:

setting up a show in powerpoint
  1. On the Set Up Show dialog window, do any of the following:
    • To present to a live audience, under Show type, select Presented by a speaker (full screen).
    • To share the PowerPoint file with your audience, under Show type, select Browsed by an individual (window).
    • To package a self-running presentation, under Show type, select Browsed at a kiosk (full screen).
  2. To define how narration, animation, and the presentation will run, do the following under the Show options section:
    • To continuously repeat the presentation until stopped, select the Loop continuously until ‘Esc’ check box.
    • To deliver a presentation without showing narration, select the Show without narration check box.
    • To deliver a presentation without playing content animations, select the Show without animation check box.
    • Select pen and laser color for illustrations during presentations.
  3. Use the options in the Advance slides section to specify how to move from one slide to another.
    • To advance to each slide manually during your presentation, click Manually.
    • To use slide timings to advance to each slide automatically during your presentation, click Using timings if present.

Rehearse the timing of a presentation

Use the rehearse timing command to determine that the timing of your presentation fits the allocated time frame. The timing will also help you to create a self-running presentation.

Before you start using the rehearse timing feature, be prepared to start delivering your presentation. To rehearse the time for your presentation, do the following:

  1. On the Slide Show tab, under the Set Up group, select Rehearse Timings.
using rehearse timing in powerpoint
  1. The slide show begins with the Rehearsal toolbar and the Slide Time box on display.
how to perform rehearse timing in powerpoint
  1. While timing your presentation, do one or more of the following using the time rehearsal toolbar:
    • Select the arrow button to move to the next slide.
    • Select the pause button to temporarily stop time rehearsal and click on Resume Recording to continue.
    • Select the repeat button to restart the time recording for the current slide.
  2. After the timing for the last slide is set, a message box displays the total time for the presentation.
    • To keep the recorded slide timings, select Yes.
    • To discard the recorded slide timings, and probably start again, select No.
conclude timing of presentations
  1. To view the time for each slide, go to View and select Slide Sorter under Presentation Views.

Share your PowerPoint Presentations Directly

If you have a direct audience, you can use a projector or larger television screen to deliver your presentations. To achieve this, connect your desktop/ laptop to the larger screen with an HDMI cable.

Please, ensure that your system can detect multiple monitors before continuing. If it does not, try to download and update the required drivers.

Display on multiple screens

When you have connected your system to the external display, do the following:

  1. Right-click a space on the desktop and select Display settings from the popup menu
  2. On the display dialog window, under Multiple displays select the Detect button to detect all connected monitors.
  3. Determine what shows on your displays by pressing (Windows logo+P) and doing any of the following:
    • Select PC Screen only to display on your primary PC
    • Select Duplicate to show the same thing on all displays.
    • Select Extend to show your desktop across all displays.
    • Select the Second screen only to display on your second display.

The presenter view

The presenter view makes delivering PowerPoint presentations in multiple displays fun. It gives you a private view with rich features while allowing the audience to view your presentation.

The presenter view has rich features that you can use while delivering your presentation to the audience. Some of these features are highlighted below.

share your powerpoint presentations using presenter view
  1. Use this feature to switch to other apps without disrupting your presentation.
  2. Click on Display Settings and choose any of Swap Presenter View and Slide show or Duplicate Slide show. The first option will switch the presenter view to the second display while the duplicate will show a slideshow on both displays.
  3. Select End Slide Show to terminate the slide show.
  4. The Timer shows the amount of time you have spent on the presentation.
  5. Use the pause button to pause the timing of your presentation.
  6. Use the restart button to restart your slide show.
  7. This is the current slide on display on the audience screen. You can use a highlighter or laser to illustrate the current slide.
  8. Shows a thumbnail of the next slide on your slide show presentation. Click on it to change the current slide.
  9. The note pane is used to take notes during the presentation. Use the larger/ smaller font icons to increase or decrease the note’s font size.
  10. This shows the current system time
  11. Use to go to the next or previous slide in your slide show.
  12. Click to select annotation and illustration tools, such as laser pointer, highlighter, etc.
  13. Click to display all the slides in your presentation. You can easily jump to any slide of your choice.
  14. Select the magnifying glass to zoom in or zoom out an area of a current slide in your presentation
  15. Select to black or unblack your presentation. You can also press B or W key on the keyboard to black or white the screen during the slideshow.
  16. Select to view other options, e.g. hide presenter view, custom shows, etc.

If the external display is working accordingly, do any of the following to enable the presenter view.

  • On the Slide Show tab, under the Monitors group, click the Show Presenter View check box.
  • On the Set Up Show dialog window, under Multiple monitors, select the Use Presenter View check box.
  • Right-click the slide show window (F5) and select Show Presenter View from the menu that appears.

Share your PowerPoint Presentations Online

To share your PowerPoint presentation online you can do any of the following:

  • Export your presentation as a video file and upload it to any of the video platforms.
  • Present your slide show to an online audience remotely using the PowerPoint desktop app.
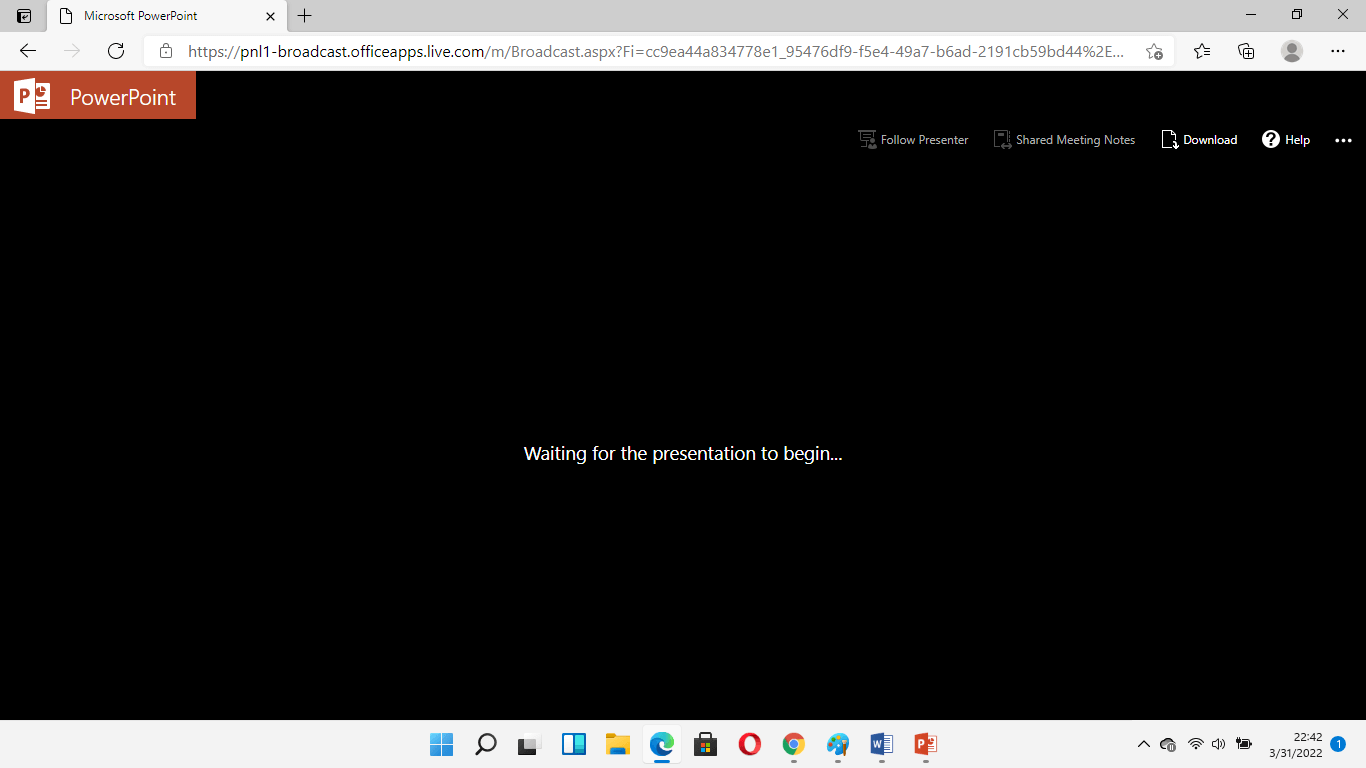
  • Deliver live presentations online using PowerPoint online. This option allows viewers to interact with you live in real-time as you make your presentation.

Upload your presentation to video platforms

You can upload your presentations to any of the following platforms: YouTube, Vimeo, Daily Motion, Facebook, etc. Before the upload, you will create an account with your chosen platform, and export your files as videos.

To export your PowerPoint presentation files as video, do the following:

  1. When you are done with your presentation, select File. In the backstage view, select Export from the menu.
share your powerpoint presentations in youtube of vimeo
  1. In the Export group, select Create a Video.
  2. Under Create a video,
    1. Click to select video quality. There are options like Ultra HD (4k), Full HD (1080p), HD (720p), etc.
    2. Under the next list, select either Use Recorded Timings and Narrations or Don’t Use Recorded Timings and Narrations.
    3. If you chose Don’t Use Recorded Timings and Narrations then, specify the number of seconds to spend on each slide.
  3. When all properties are set, click the Create Video button. The Save As dialog box appears.
  4. On the Save as dialog box, choose where to save your file. Then type a name for your video file and click the Save button.
  5. When PowerPoint is finished converting to video, upload your video file to your chosen platform.

Present your slide show online remotely

You can deliver your presentation online from your PowerPoint desktop app. To broadcast your presentation to a remote audience, you will need to connect to the internet. Also, your audience will need an internet connection and a web browser to access your presentation online.

To get started broadcasting your PowerPoint online, do the following:

  1. On the Slide Show tab, under Start Slide Show select Present online.
  2. From the menu that appears, select Office Presentation Service.
  3. On the Present online dialog window, select Connect. To enable your audience to download your presentation, select the Enable remote viewers to download the presentation.
deliver your powerpoint presentations online remotely
  1. After the presentation has been successfully prepared for audience view, a share link is generated.
send a link to viewers to connect to your show
  1. On the window that appears, copy the generated link and send it to your audience. You can email the link or share the link on Facebook, WhatsApp, etc. It will also be good to let them know when to connect to your presentation via the link.
  2. After your audience has received the link, and you are ready, click on the Start Presentation button. If your audience has connected with the link, they will view your presentation via a browser.
delivering powerpoint presentation to remote viewers
  1. To end your presentation, press the Esc key on the keyboard to end the slide show.
  2. On the Present Online tab, select End Online Presentation. A dialog box appears.
terminating remote broadcast online
  1. Select End Online Presentation to disconnect all connected audiences.

Present your slide show online in real-time

You can also present your PowerPoint slideshow live for real-time audience interaction. But to achieve this, you will need PowerPoint for the web app.

Package and Share your PowerPoint Presentations

Apart from exporting your presentation as a video file, you can also package your presentations on CD, DVD, or flash. This will enable people that receive such devices to watch your presentation on their system.

When you use a package for CD, all external files are copied to the CD or flash drive. This ensures that there will be no broken links when running the presentation.

You can send the CD, DVD, or flash drive to your audience at any location to view.

Package for CD

Follow the steps below to copy your presentation to a folder:

  1. Open the presentation you want to package and insert a blank or rewritable CD.
  2. Select File. On the backstage view, select Export.
  3. On the Export group, select Package Presentation for CD.
  4. On the Package Presentation for CD window, select the Package for CD button. The package for the CD dialog window appears.
package and share your powerpoint presentations in cd
  1. On the package for CD dialog window, do the following.
    • Enter a name for the CD in the Name the CD text box.
    • Click the Add button to add more presentation files to the package
    • If you added more than one presentation file, use the reorder buttons to order the presentation. The presentations will play in the order they are arranged in the files to be copied window.
    • Click the Options button to add password security to the CD. Leave the selected option buttons to copy linked files and embedded TrueType font. Then click OK to return to the package for CD window.
    • To remove a PowerPoint file, select the file and click Remove.
  2. When done with your selections, click on the Copy to CD button to copy your presentation files.

Package for flash drive

To package your presentation files in a USB flash drive, do the following

  1. Open the presentation you want to package and insert the USB stick into the USB port.
  2. Select File. On the backstage view, select Export.
  3. On the Export group, select Package Presentation for CD.
  4. On the Package Presentation for CD window, select the Package for CD button. The package for CD dialog window appears.
  5. On the package for CD dialog window, do the following.
    • Enter a name for the flash drive in the Name the CD text box.
    • Click the Add button to add more presentation files to the package
    • If you added more than one presentation file, use the reorder buttons to order the presentation. The presentations will play in the order they are arranged in the files to be copied window.
    • Click the Options button to add password security to the flash drive. Leave the selected option buttons to copy linked files and embedded TrueType font. Then click OK to return to the Package for CD window.
    • To remove a PowerPoint file, select the file and click Remove.
  6. When done with your selections, click on the Copy to Folder button to copy your presentation files. A dialog box appears.
package and share your powerpoint presentations in USB drive
  1. On the dialog box, do the following:
    • Select Browse and locate the USB stick.
    • When done, click the OK button. A dialog box appears asking you about linked files.
    • Select Yes on the dialog box. The file begins to copy.
  2. When PowerPoint is done copying the files, it opens a window showing all copied files in the USB package.

Conclusion

In this tutorial, you learned:

  • how to rehearse timing for your PowerPoint presentation
  • Share your presentations directly to the audience using multiple displays.
  • Share your PowerPoint presentations online using video platforms, and broadcast them via the PowerPoint desktop app.
  • How to package and deliver your presentation in CD or USB flash drive.

We also disclosed that to perform a live broadcast in PowerPoint you will use PowerPoint for the web.

We have come to the end of our PowerPoint tutorials. If you have questions or an area you want us to cover, kindly contact us or use the comment box.

If this tutorial and others in the series are helpful, kindly help us share with others. Also, subscribe to our YouTube channel to receive the video tutorial whenever it is released. Thank you for being there for us.

0
    0
    Your Cart
    Your cart is emptyReturn to Shop
    Exit mobile version
    %%footer%%