Fonts are used to define the nature of texts. They define the text’s character look, size, weight, and style. Fonts in web design are used to define the nature of texts on a web page.
There are thousands of fonts available, but all these fonts are not installed in users’ systems. In web design, it is good practice to define the fonts you are expecting your texts to display in users’ browsers.
When defining fonts in web design, we can combine generic, custom and web fonts.
Fonts in Web Design
Generic fonts
Some fonts are guaranteed to be available across all platforms and systems. These kinds of fonts are called web-safe fonts. When defining fonts in web design, especially, a font-family, it is advisable to declare any kind of font. But in the end, always declare web-safe fonts, as a fallback.
Some web-safe fonts include Arial, Times New Roman, Helvetica, Georgia, Impact, Verdana, Courier New, Trebuchet MS, Comic Sans MS, etc. Most of these fonts belong to the generic font’s family as discussed below.
Generic fonts include serif, sans-serif, monospace, cursive and fantasy. Let’s check the features of each of them briefly.
Serif fonts define fonts with small lines at the end of each character. They include the following font-family: ‘times new roman’, times, Georgia, serif, bookman, etc.
Sans-serif are fonts without serif. They include the following font-family: Arial, sans-serif, ‘trebuchet ms’, Verdana, Helvetica, Tahoma, etc.
Monospace is fonts with fixed width. They are fonts in the following font-family: ‘courier new’, ‘Lucida console’, monospace, Consolas, ‘Ocr a extended’, etc.
Cursive fonts define fonts that look like handwriting. It usually has connecting strokes. It includes the following font-family: cursive, comic sans, brush script mt, Bradley hand, etc.
Fantasy fonts are fonts that have decoration, especially used for titles. The font-family include impact, fantasy, luminary, etc. Some of the fantasy fonts may not be used across browsers.
Defining fonts in web design
When defining fonts in web design, the following properties can be individually specified. We can also use the Font shorthand property to specify them as follow:
font: font-style font-variant font-weight font-stretch font-size/line-height font-family
E.g.
p{
  font: italic small-caps bolder expanded 1.5em/1.5 cursive, 'trebuchet ms' Georgia;
}
The shorthand method requires only the font-size and font-family, while a slash (/) is used in between font-size and line-height
Let’s look at the individual properties.
font-style property: This property is used to specify the text stylishness. It has the following values: normal, italic, and oblique.
font-variant property: This is used to specify normal text or small caps text. Its values are: normal and small-caps.
font-weight property: This is used to specify the boldness of text content. It has the following values: normal, bold, bolder, lighter, 100 – 900.
font-stretch property: Is used to expand or compress text content. It has the following values: normal, condense, semi-condensed, extra-condensed, ultra-condensed, expanded, semi-expanded, extra-expanded, ultra-expanded.
font-size: Used to specify the extent or dimension of text content. It has the following values pixels, ems, rems, VW (viewport width), percentages, etc.
line-height property: used to set the height of each line of text. The values usually take a unitless value or unit of length values.
font-family property: used to specify the family of texts. Values include ‘trebuchet ms’, Verdana, Arial, ‘times new roman’, serif, etc.
@font-face property
We use the @font-face rule to include custom fonts or web fonts to web pages. A non-generic font is usually defined using @font-face. If such a font is not in the users’ computer, it will be automatically downloaded to the user when needed.
These days, there are thousands of fonts to choose from by any web designer. You are not limited to the generic fonts. As a web designer, you have the option of using any font of your choice. All you need do is to correctly include the font in your CSS at ruleset.
Before proceeding, let us take note of the following:
- Some fonts are free while others are commercially provided. To use any font on your website you must have the appropriate licensing.
- Some font formats are not supported across browsers. Different browsers support different font formats. For example:
- Embedded Open Type (.eot) fonts are supported by Internet Explorer only.
- True Type Font and Open Type Font (.ttf/.otf) are supported by major browsers such as Internet Explorer, Chrome, Firefox, Opera and Safari.
- Web Open Font Format (.woff) is also supported across browsers: Internet Explorer, Chrome, Firefox, Opera and Safari. However, WOFF version 2 (.woff2) is not supported by IE and Safari.
- Scalable Vector Graphic (.svg) fonts are supported by Chrome, Opera, and Safari.
Hence, before you choose a font, be careful to know the format, and ensure that it can be supported by most browsers.
Using custom fonts in web design
- To use custom fonts in web design, we need to first download the font from free fonts distributors or commercial font distributors.
NOTE: Even if we are using the free fonts, you must understand that to use the font for commercial purposes, you need to obtain a commercial license. Free fonts are mostly for personal use.
Some free fonts distributors include:
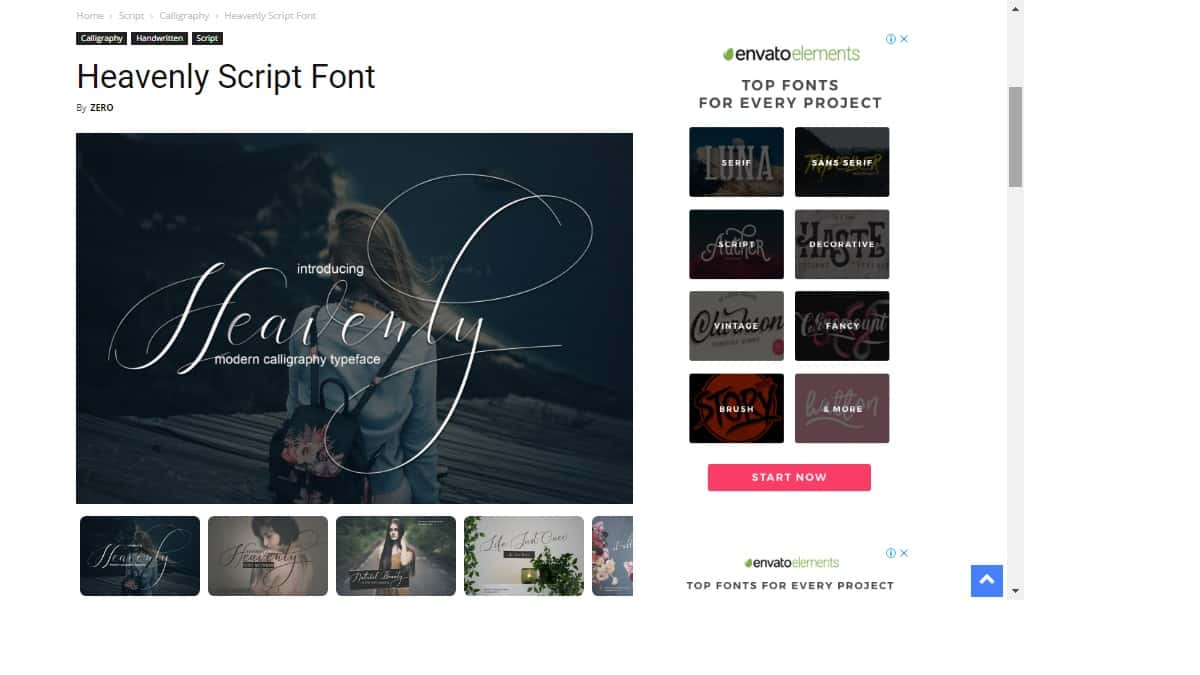
In this tutorial, we will download and use Heavenly Script from Befonts. You can actually use any font of your choice. Just follow the procedure.
- Visit Befonts website @ https://befonts.com/
- search for Heavenly Script, or any font of your choice
- select the font when displayed,
- scroll down and click download.

- After downloading fonts from any of the above font distributors, unzip the downloaded fonts. Then save it in your website files folder.
Make sure the font’s file is placed in the same location as your CSS file. For example, the downloaded font has been unzipped and placed in the same location as my website files.
- You might decide to rename the font’s file name for easy access. But remember to take note of the file extension name, that is, the font format: .ttf, .otf. .woff, etc.
For example, the downloaded font is an OpenType Font (.otf). I just changed the name to ExFont.otf.
- Open your CSS file and enter the following codes in the first line:
@font-face{

     font-family: ExFont;

     src: URL("ExFont.otf");

}- If you want to include more than one font-family, repeat No. 4 as many times as the number of fonts you want to include.
For example,
@font-face{

      font-family: ExFont;

      src: url("ExFont.otf");

}

@font-face{

      font-family: Cassandra;

      src: url("Cassandra.ttf");

}

@font-face{

      font-family: "Lovely Home";

      src: URL("Lovely Home.ttf");

}- If you have more than one type of the same font’s format, include them in your URL function, separated by a comma. Also, include each file format.
For example,
@font-face{

      font-family: ExFont;

      src:  url("ExFont.otf") format(“opentype”),

            url(“ExFont.ttf”) format(“truetype”),

            url(“ExFont.woff”) format(“woff”),

            url(“ExFont.woff2”) format(“woff2”);

}- Apart from the font-family and src properties, you may also specify font-weight and font-style properties in the @font-face at-rule.
For example,
@font-face{

     font-family: ExFont;

     src: URL("ExFont.otf");

     font-weight: bold;

     font-style: italic;

}- Finally, include the defined font-family in any element of your HTML, with a generic font at the end. For example,
p{
  font-family: ExFont, sans-serif;
}
Using Web fonts in Web Design
Custom font requires that you will download the font first, and then upload the same to your server. Your users will also be required to download the font when they access your website.
Instead of doing this, an easier and better option is to use an online font service. The advantage of using an online font service is that they store and serve the fonts from their servers. This will help you save bandwidth.
Some of the online font services are:
Web Font Service | Requirement |
requires creative cloud subscription | |
requires licensing | |
requires cloud or self-hosted subscriptions | |
completely free, but uses JavaScript instead of CSS. | |
completely free |
We shall illustrate with Adobe Edge Web Fonts and google fonts.
Adobe Edge Web Fonts
Using Adobe Edge Fonts is simple and straight forward:
- Go to http://www.edgefonts.com/index
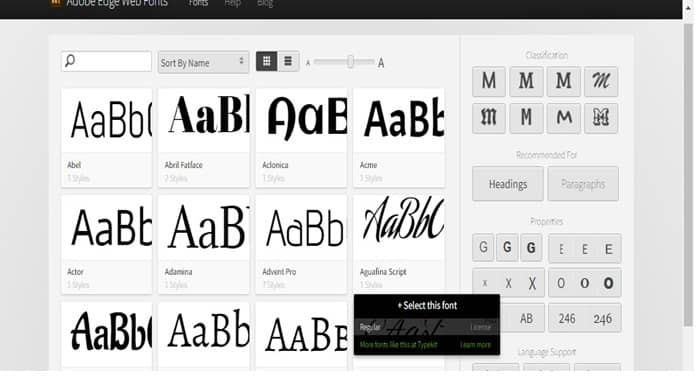
- Click on Get Started to display a list of available fonts as shown below:

- Point at your desired font and click on +select this font.

- It will display the JavaScript source file and CSS declaration as shown below:

- Copy the Javascript source file and add it to the <head> section of your HTML file, and copy the CSS font-family declaration and paste it in your CSS file.
For Example:
<!Doctype html>

<html>
<head>

      <script src="//use.edgefonts.net/aguafina-script.js"></script>

</head>

<body>

      <p>
         This is a paragraphy ...
      </p>

</body>
CSS File Code:
p{
   font-family: aguafina-script, cursive;
}
Google Fonts Service
To use the google fonts service, follow the following procedure:
- Visit https://fonts.google.com/
- In the window that appeared, search for the font of your choice.
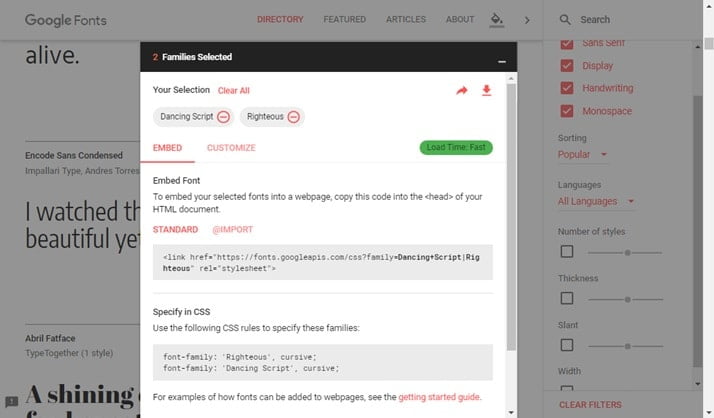
- If you locate your desired font, click the (+) button on the right of your chosen font. See the diagram below.

- After you select a font, a dark rectangular box will appear at the bottom of your window displaying 1 Family selected.
Select as many font families as you want.

- When you are done selecting all the fonts you want, click on the dark rectangular box to reveal the CSS information.

- Under Embed Font, copy the CSS external link file information and paste it at the <head> section of your HTML document.
For example, I selected Dancing Script and Righteous fonts. From my selection, I have the following:
<head>

  <link href="https://fonts.googleapis.com/css?family=Dancing+Script|Righteous" rel="stylesheet">

</head>
- Finally, add the font-family property to any HTML element you wish in your CSS code, as was specified.
For example:
section{
  font-family: 'Dancing Script', cursive;
  width: 70%; font-size: 20px;
  margin: 0 auto;
}

h1{
  background-color: blue;
  position:sticky;
  top: 20px;
  font: italic small-caps bolder expanded 1.5em/1.5 Righteous;
}

p{
  font-family: 'Dancing Script', cursive;
  font-stretch: expanded;
}
Your website should by now look differently.
This is where we will end today’s tutorial. Remember to visit our tutorials on Responsive web design and how to use the @media rules to create a responsive website. Video courses are also available. You can start here.
Next week, we shall complete our tutorials on CSS with the transform property and CSS Animations. Hoping to get your feedback.


